WordPress is a popular open source CMS(content management system) that makes it easy and simple to create and manage websites. WordPress has many advantages, such as rich plugins and themes, flexible customization capabilities, strong community support, etc. However, if you actually publish a WordPress website on a hosting server, you first need to purchase a domain name and server space, as well as configure the server and database and other work. In addition, editing errors are likely to cause problems such as pages not displaying, or server failure. Therefore, whether for learning, testing or development, it is safest and most convenient to deploy locally first. This article will introduce the detailed steps on how to use XAMPP to deploy WordPress personal website locally.
According to the official website: XAMPP is a cross-platform package that includes components such as Apache, MySQL, PHP and Perl, allowing you to create a local environment similar to a real server. The advantage of using XAMPP is that you don’t need to install and configure these components separately, and it supports Windows, Mac and Linux systems, which is very convenient. To build a WordPress website locally using XAMPP, you need to follow these steps:
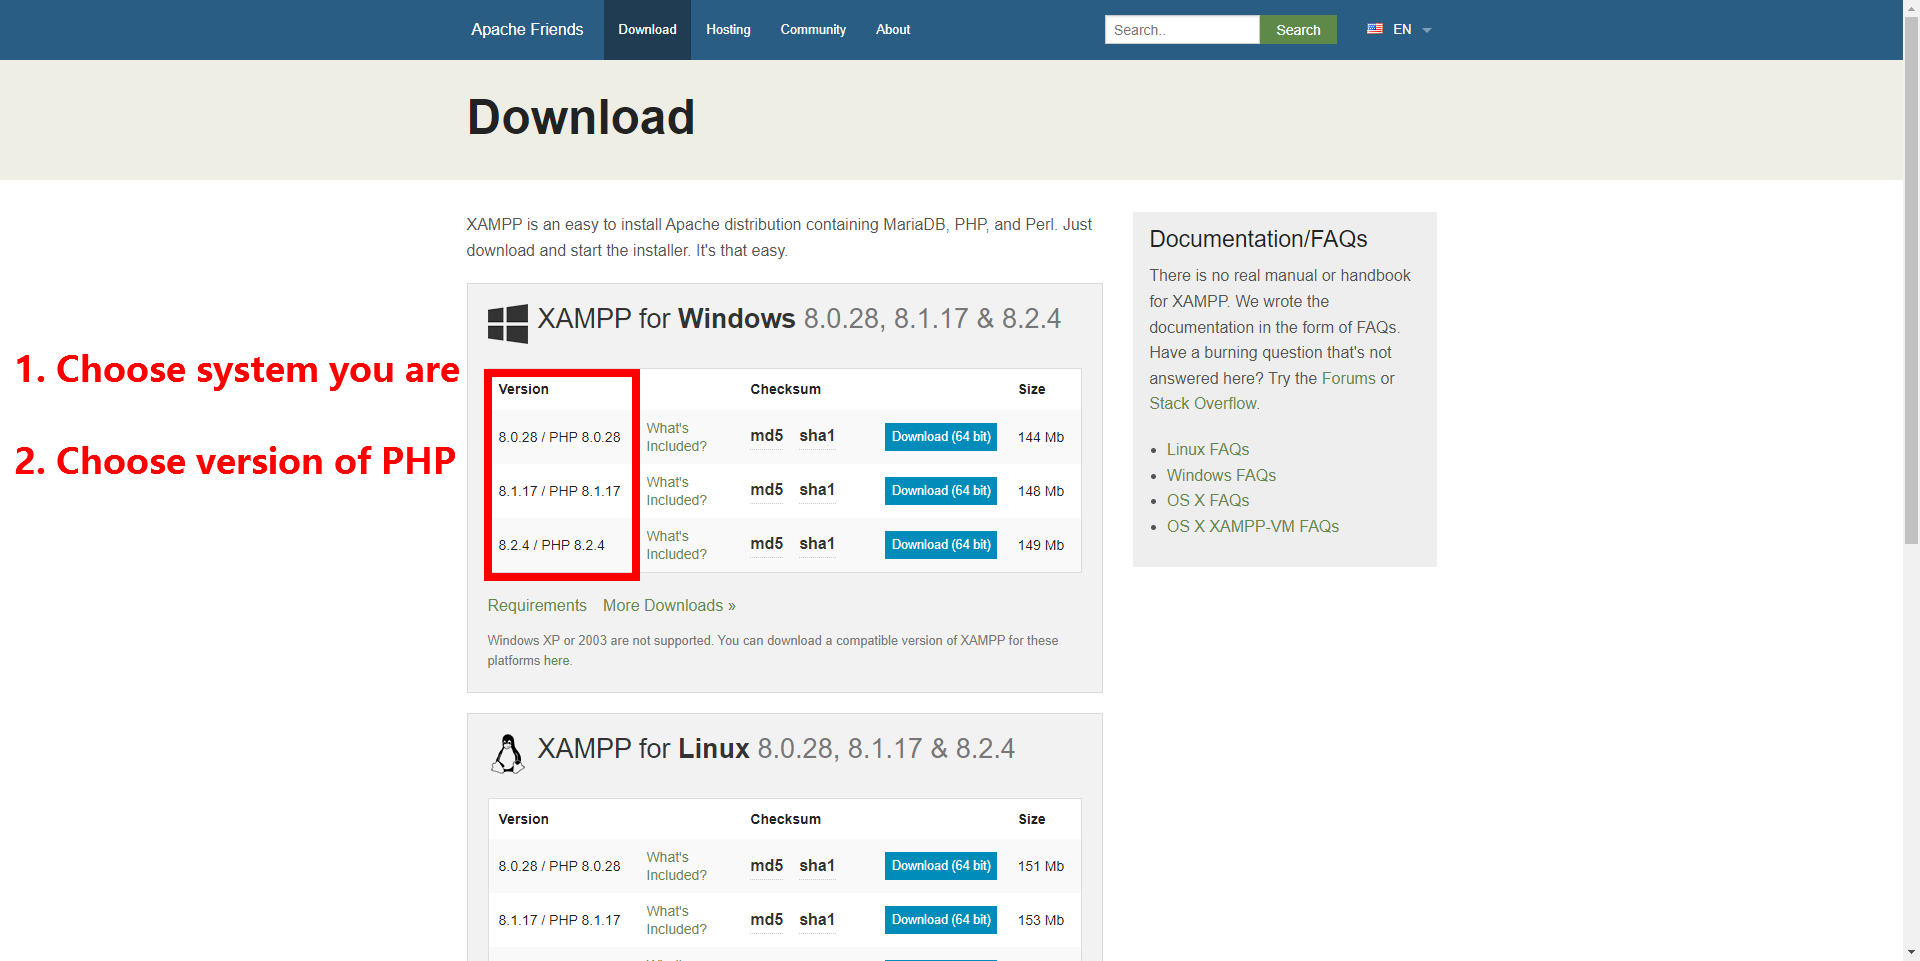
1. Download and install XAMPP
You can download the version suitable for your operating system from the XAMPP official website and follow the instructions to install it. During the installation process, you can choose which components to install, generally speaking, the default settings are sufficient for WordPress.
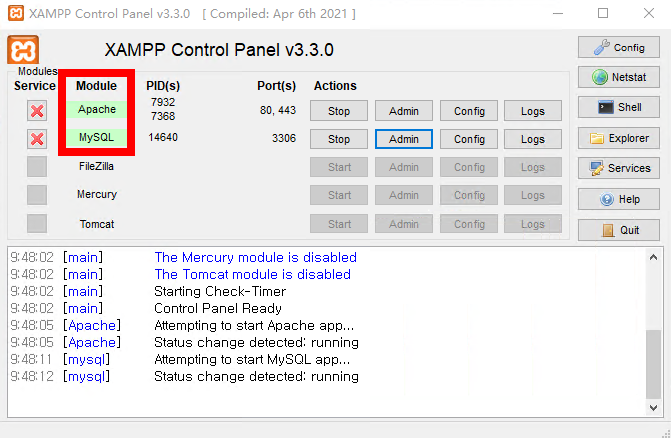
2. Start XAMPP
Once the installation is complete, open the XAMPP control panel and click the “Start” button to start the Apache and MySQL services. These two services are indispensable to run WordPress. If you encounter firewall or port hogging problems, you will need to resolve them in order to start the services properly.
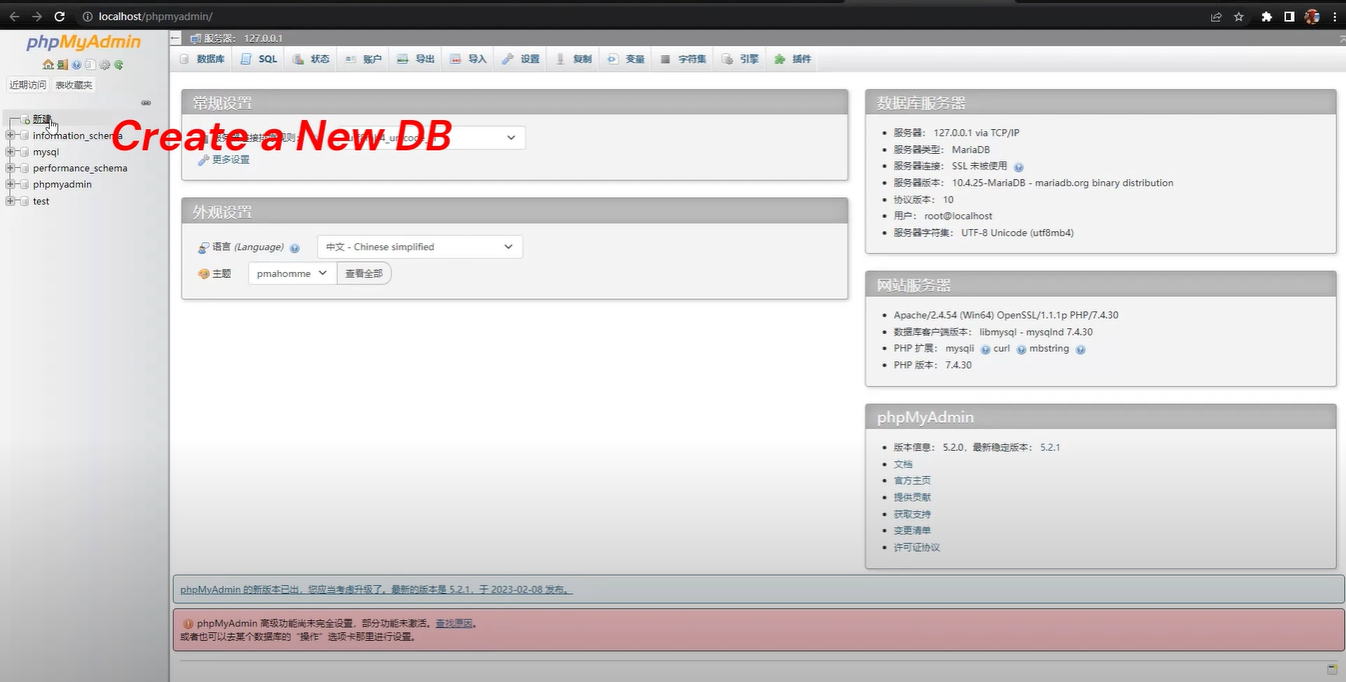
3. Create a database
WordPress requires a database to store the site’s data. You can open phpMyAdmin (the tool for managing databases) via the Admin button in the XAMPP control panel. In phpMyAdmin, click on the Databases tab, enter a database name (e.g. yoursite_db), and click on the Create button to create an empty database.
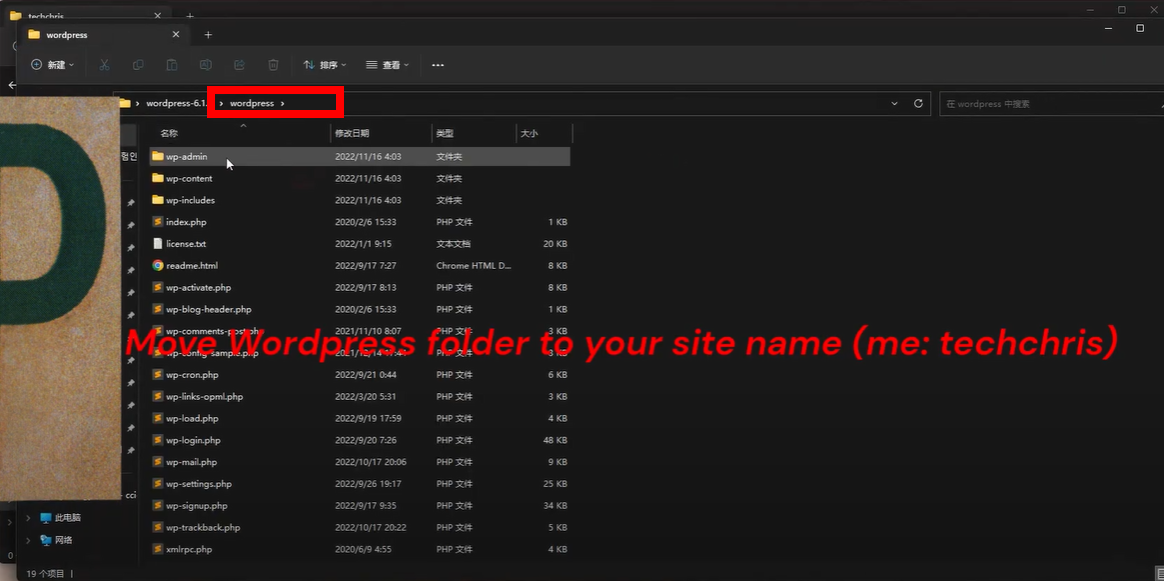
4. Download and unzip WordPress
Download the latest version of the WordPress archive from the WordPress website and extract it to a folder (e.g. testsite). Then, copy this folder to the htdocs folder in the XAMPP installation directory. This folder is the root directory of your website.
5. Install WordPress
Open your browser and type in http://localhost/testsite (testsite is the name of your website folder) and you will see the WordPress installation wizard.
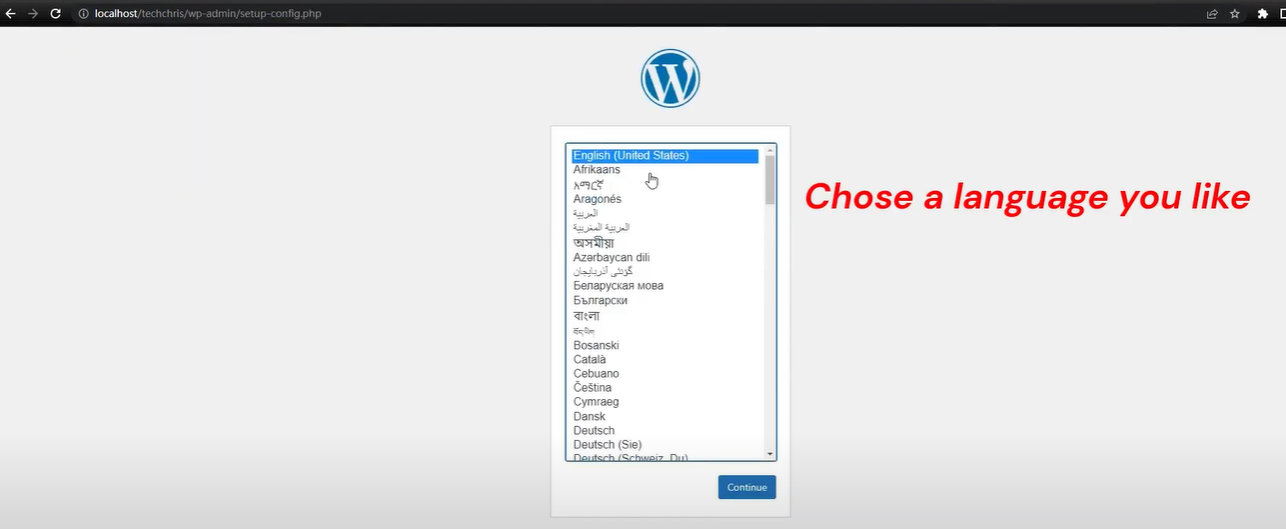
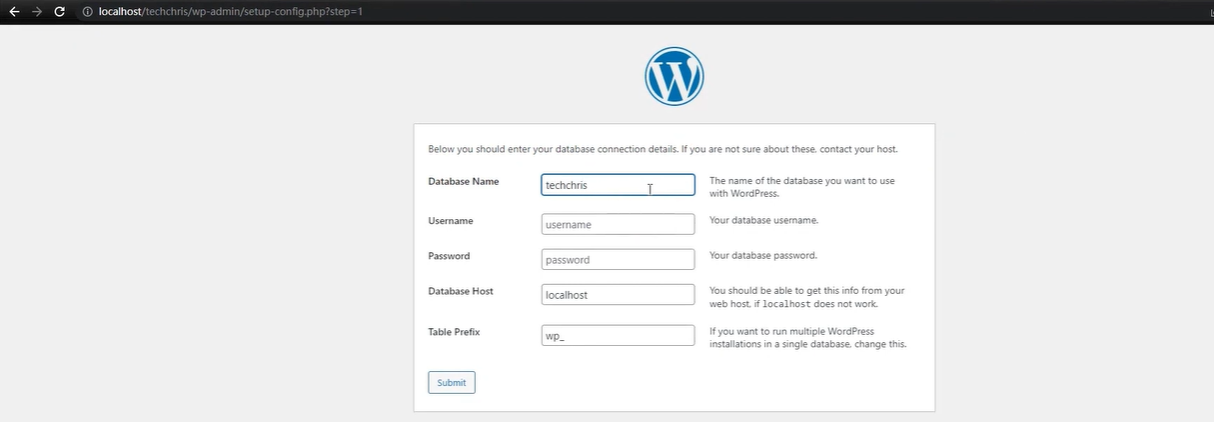
Follow the prompts to select the language, enter the database information (database name is wp, user name is root, password is empty, host is localhost)
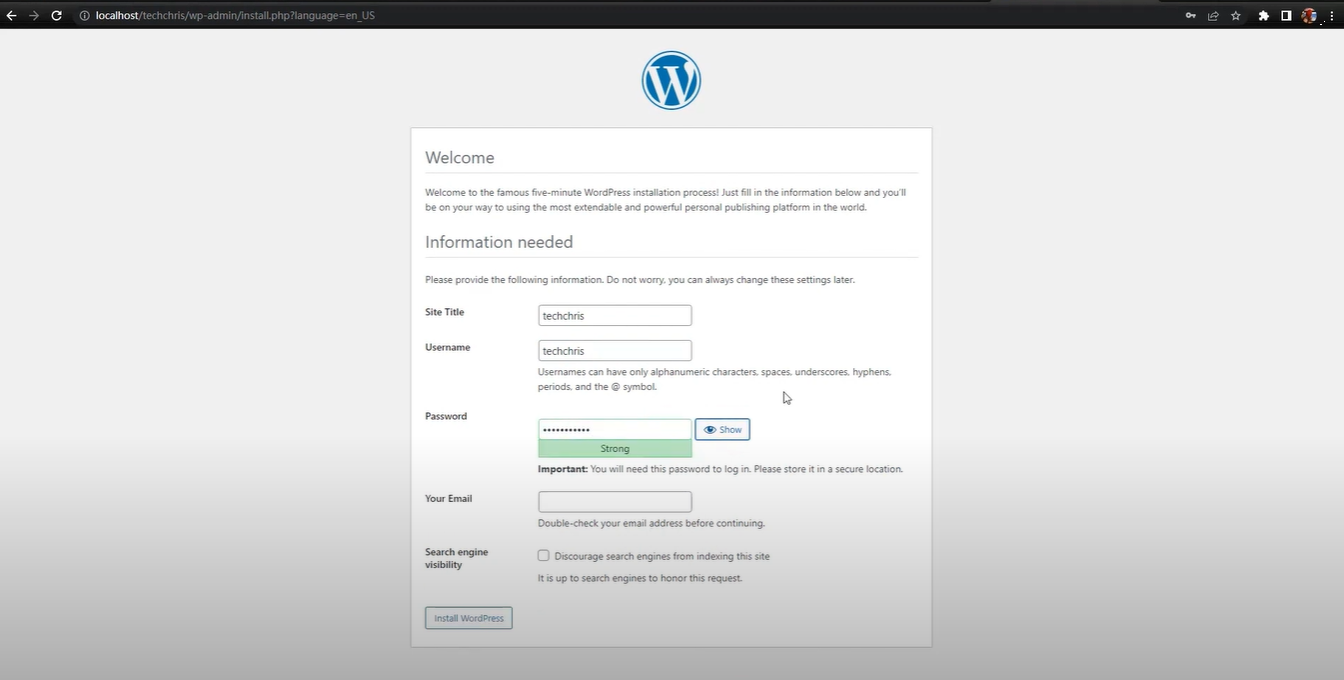
Type site information (site title, admin account, password and email)
Once this is done, you can log in to the WordPress backend.

Until this step, have successfully built a WordPress website locally! You can do various operations on this website, such as changing themes, installing plugins, publishing content, etc. Of course, this website can only be seen by you, or only in the LAN. If you want to make it accessible to others, you need to deploy it to a real server.
Now you have successfully deployed WordPress locally, if you want to deploy it on a webserver, please refer to “How to deploy a WordPress website to a webhosting“
Views: 18